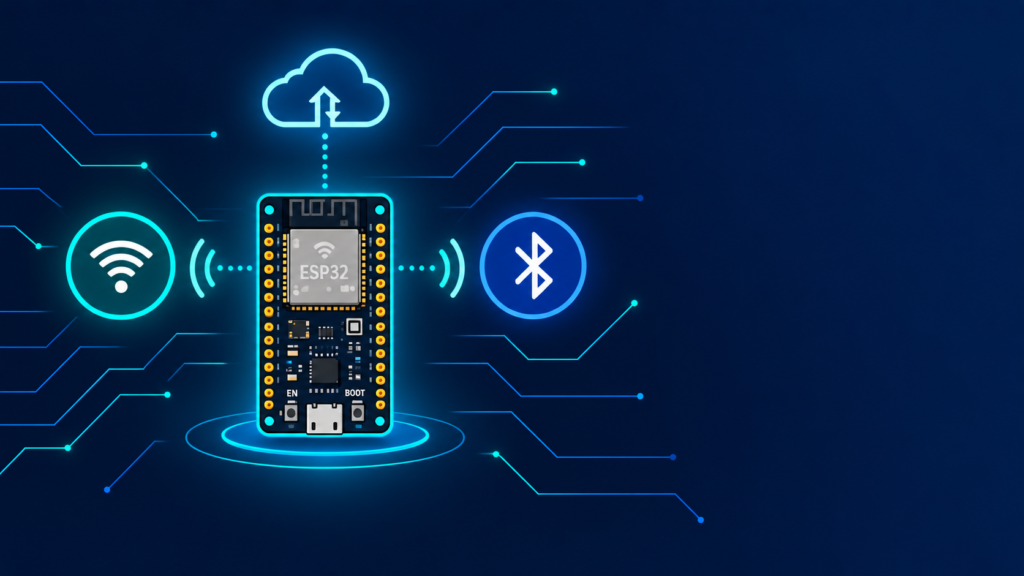
Arduino boards can connect to WiFi and Bluetooth networks for IoT (Internet of Things) projects either by adding an external module (like the HC-05 Bluetooth module or ESP8266 WiFi module) to a standard Uno/Nano, or by using the ESP32, a microcontroller with built-in WiFi and Bluetooth that can be programmed directly through the Arduino IDE after adding its board package via the Boards Manager. For cloud-connected dashboards, Arduino Cloud provides a free, official platform to monitor sensor data and control devices remotely from a phone or browser without building a custom server.
Key takeaways
- ESP32 has built-in WiFi and Bluetooth no external module needed, unlike Arduino Uno/Nano.
- ESP32 is programmed through the same Arduino IDE, after installing its board definitions via the Boards Manager URL.
- HC-05/HC-06 Bluetooth modules add Bluetooth Classic (not BLE) to standard Arduino boards for simple phone-app control.
- Arduino Cloud (formerly Arduino IoT Cloud) is the official free platform for building dashboards and remote control without hosting your own server.
- ESP32 uses 3.3V logic connecting 5V sensors directly can damage it; level-shifting or 3.3V-compatible sensors are required.
Arduino Uno/Nano vs ESP32 for IoT projects
| Feature | Arduino Uno/Nano | ESP32 |
|---|---|---|
| Built-in WiFi | No (needs ESP8266/ESP32 add-on module) | Yes |
| Built-in Bluetooth | No (needs HC-05/HC-06 module) | Yes (Classic + BLE) |
| Logic voltage | 5V | 3.3V |
| Clock speed | 16MHz | Up to 240MHz (dual-core) |
| Best for | Simple sensor/actuator projects | WiFi dashboards, BLE apps, remote monitoring |
| Programmed via | Arduino IDE | Arduino IDE (after adding ESP32 board package) |
Setting up ESP32 in Arduino IDE
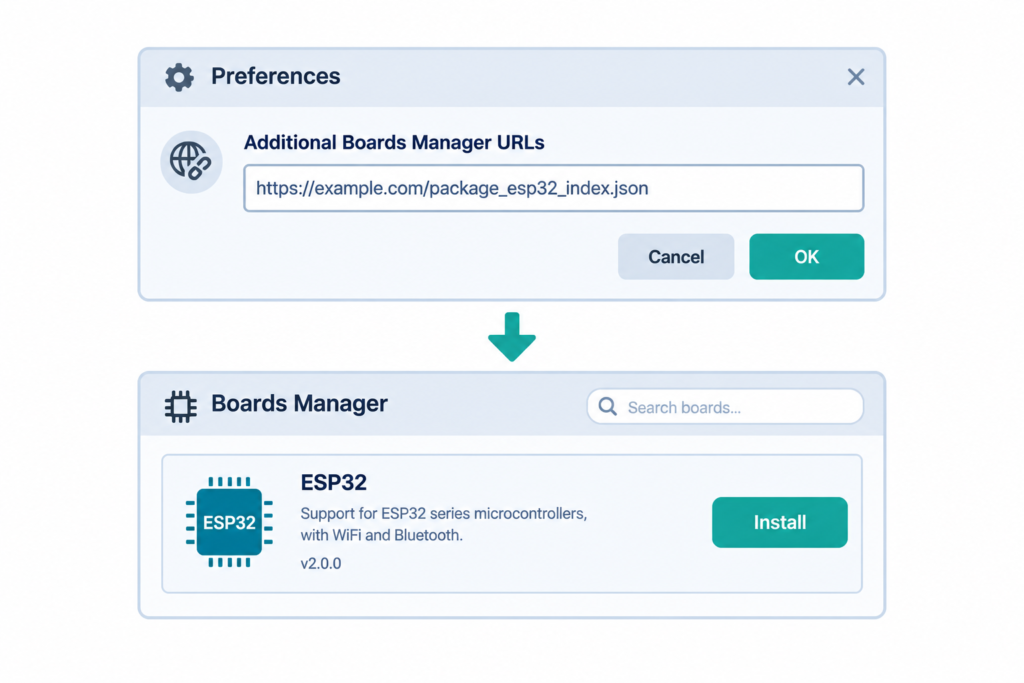
- Open Arduino IDE → File → Preferences.
- In “Additional Boards Manager URLs,” paste:
https://raw.githubusercontent.com/espressif/arduino-esp32/gh-pages/package_esp32_index.json - Go to Tools → Board → Boards Manager, search “esp32,” and install the package by Espressif Systems.
- Once installed, go to Tools → Board and select your specific ESP32 model (e.g., “ESP32 Dev Module”).
- Connect the ESP32 via USB, select the correct Port, and upload a test sketch (File → Examples → WiFi → WiFiScan is a good first test).
Common setup issue: Many ESP32 boards require holding the BOOT button during upload if the IDE shows a “Connecting…” timeout this manually puts the chip into flashing mode when auto-reset isn’t supported by the specific board/cable combination.
Project 1: Bluetooth phone-controlled LED (HC-05 + Arduino Uno)
Components needed
| Component | Quantity |
|---|---|
| Arduino Uno | 1 |
| HC-05 Bluetooth module | 1 |
| LED + 220Ω resistor | 1 each |
| Smartphone with a Bluetooth terminal app | 1 |
Wiring diagram
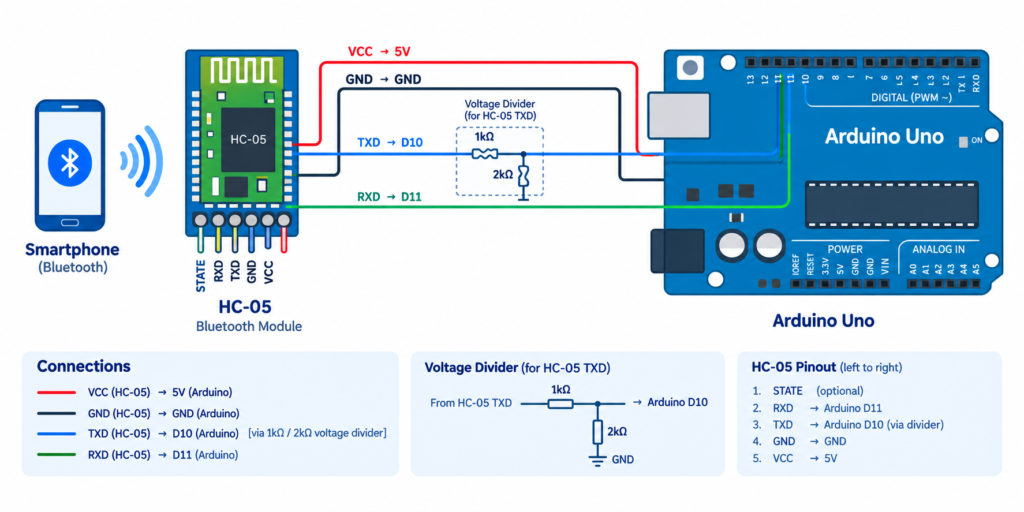
| HC-05 Pin | Connects to |
|---|---|
| VCC | Arduino 5V |
| GND | Arduino GND |
| TXD | Arduino pin 10 (via voltage divider HC-05 TX is 3.3V logic) |
| RXD | Arduino pin 11 |
Arduino code
cpp
#include <SoftwareSerial.h>

SoftwareSerial bluetooth(10, 11); // RX, TX
const int ledPin = 13;

void setup() {
  pinMode(ledPin, OUTPUT);
  bluetooth.begin(9600);
}

void loop() {
  if (bluetooth.available()) {
    char command = bluetooth.read();
    if (command == '1') {
      digitalWrite(ledPin, HIGH);
    } else if (command == '0') {
      digitalWrite(ledPin, LOW);
    }
  }
}
Pair the HC-05 with your phone (default PIN is usually 1234 or 0000), open any Bluetooth serial terminal app, connect, and send 1 or 0 to control the LED.
Project 2: WiFi-connected temperature monitor (ESP32)
Components needed
| Component | Quantity |
|---|---|
| ESP32 dev board | 1 |
| DHT11 or LM35 sensor | 1 |
| WiFi network (2.4GHz — ESP32 does not support 5GHz) | 1 |
Arduino code
cpp
#include <WiFi.h>
#include <DHT.h>

#define DHTPIN 4
#define DHTTYPE DHT11

const char* ssid = "YOUR_WIFI_NAME";
const char* password = "YOUR_WIFI_PASSWORD";

DHT dht(DHTPIN, DHTTYPE);
WiFiServer server(80);

void setup() {
  Serial.begin(115200);
  dht.begin();

  WiFi.begin(ssid, password);
  while (WiFi.status() != WL_CONNECTED) {
    delay(500);
    Serial.print(".");
  }
  Serial.println("Connected! IP address: ");
  Serial.println(WiFi.localIP());
  server.begin();
}

void loop() {
  WiFiClient client = server.available();
  if (client) {
    float temp = dht.readTemperature();
    client.print("Temperature: ");
    client.print(temp);
    client.println(" C");
    delay(10);
    client.stop();
  }
}
After upload, open the Serial Monitor to find the ESP32’s IP address, then visit that IP in any browser on the same WiFi network to see the live temperature reading.
Important: ESP32 GPIO pins run at 3.3V logic, not 5V. Connecting a 5V-only sensor’s output directly to an ESP32 pin can damage it use 3.3V-compatible sensors or a logic level shifter.
Introduction to Arduino Cloud (IoT dashboard)
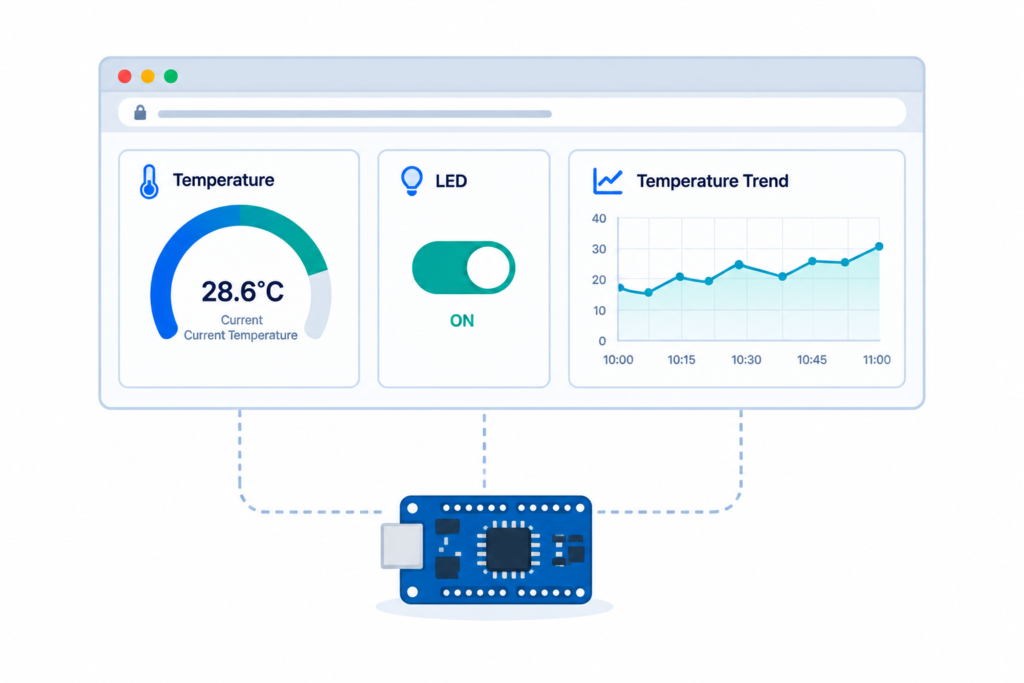
Arduino Cloud (formerly Arduino IoT Cloud) is the official platform for building remote dashboards without writing server-side code:
- Create a free account at Arduino Cloud.
- Add a “Thing” (a project) and link a compatible board (ESP32, Arduino Nano ESP32, MKR WiFi boards, and others are supported).
- Define “Variables” (e.g., temperature, LED state) that sync automatically between your board and the cloud.
- Build a dashboard by dragging widgets (gauges, switches, charts) linked to those variables.
- Access the dashboard from a browser or the free Arduino IoT Remote mobile app, from anywhere with internet.
This removes the need to manually build a WiFiServer/webpage setup like Project 2 above Arduino Cloud handles the networking, authentication, and dashboard UI automatically, at the cost of relying on Arduino’s hosted service rather than a fully custom solution.
HC-05 (Bluetooth Classic) vs BLE vs WiFi: which to use?
| Method | Range | Power use | Best for |
|---|---|---|---|
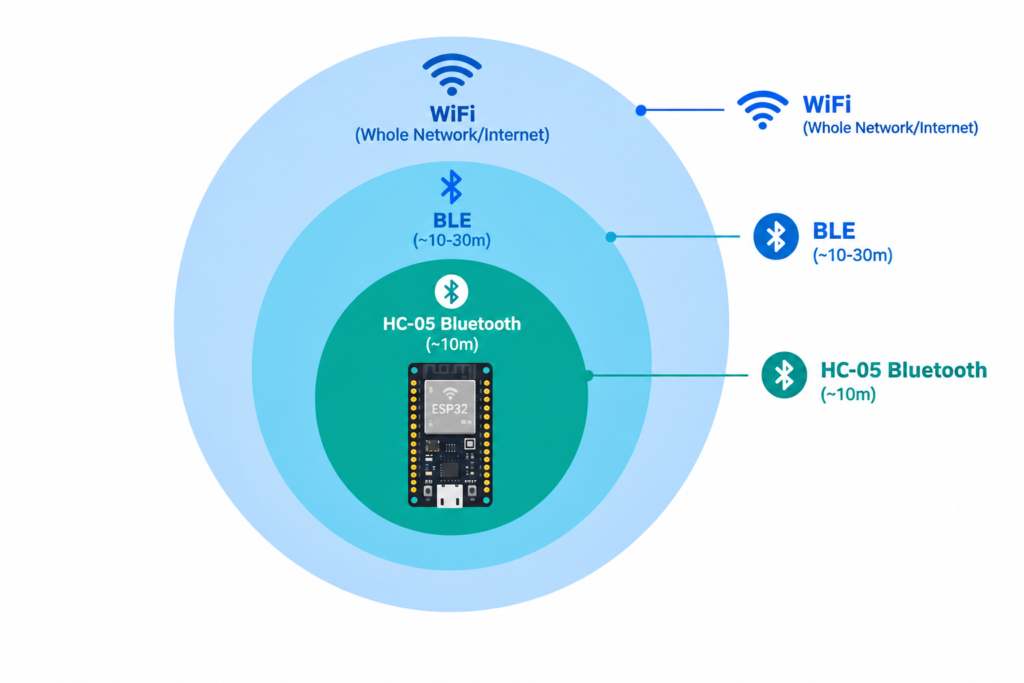
| HC-05 (Bluetooth Classic) | ~10m | Moderate | Simple phone-app control, no internet needed |
| BLE (ESP32 built-in) | ~10–30m | Low | Battery-powered wearables, sensor beacons |
| WiFi (ESP32 built-in) | Whole network/internet | Higher | Remote monitoring, dashboards, internet-connected control |
Frequently asked questions
Does Arduino Uno have built-in WiFi?
No. Standard Arduino Uno and Nano boards have no built-in WiFi or Bluetooth these require an external module like ESP8266 (WiFi) or HC-05 (Bluetooth), or switching to an ESP32/Arduino boards with WiFi built in (like Uno R4 WiFi).
How do I add ESP32 support to Arduino IDE?
Add the ESP32 Boards Manager URL in File → Preferences, then install the “esp32” package by Espressif Systems through Tools → Board → Boards Manager.
What is the difference between HC-05 and ESP32 Bluetooth?
HC-05 only supports Bluetooth Classic for simple serial communication with phones, while ESP32 supports both Bluetooth Classic and BLE (Bluetooth Low Energy), plus built-in WiFi HC-05 is an add-on module, ESP32 has it built in.
Is Arduino Cloud free to use?
Yes, Arduino Cloud offers a free tier suitable for personal and student projects, with paid tiers unlocking more “Things,” devices, and data retention for larger deployments.
Why does my ESP32 keep disconnecting from WiFi?
The most common causes are connecting to a 5GHz network (ESP32 only supports 2.4GHz WiFi), weak signal strength, or insufficient power supply ESP32’s WiFi radio draws current spikes that a weak USB port or cable may not supply reliably.